❌

Lese-Ansicht

How to share your location via satellite on iPhone

Apple’s satellite features are designed for situations where cellular and Wi-Fi coverage are unavailable. In supported regions, compatible iPhone 14 or later models can connect directly to a satellite to send messages, access Emergency SOS and share location data. Location sharing via satellite is particularly useful when traveling in remote areas, hiking or driving through regions with limited network coverage. This guide explains what is required to use location sharing via satellite on an iPhone, how to prepare the feature in advance and how to send your location when no signal is available.

How to share your location via satellite

When there is no cellular or Wi-Fi signal available, open the Find My app. If satellite connectivity is possible, the app will prompt you to connect to a satellite. Onscreen instructions will guide you to point the iPhone toward the sky and adjust its position to maintain a connection.

Once connected, select the option to share your location. The iPhone will record your current location and send it via satellite to the selected contact. During this process, it is important to keep the device steady and follow the visual guidance until the transmission is complete.

After the location is sent, the contact can view it in their Find My app. The shared location represents a specific moment in time rather than ongoing movement.

What you need before using satellite location sharing

Location sharing via satellite is available on iPhone 14 models and later that are running iOS 18 or newer. The feature is supported only in specific countries and regions, and its availability may vary by local regulations. Satellite services also require a clear view of the sky, which means dense tree cover, buildings, mountains or being indoors can interfere with connectivity.

Apple offers satellite features free of charge for two years with the activation of an iPhone 14 or later, although this policy may change over time. It is important to confirm that satellite services are active on the device before relying on them in a remote setting.

Location sharing via satellite works through the Find My app. Unlike Emergency SOS, it is not intended for urgent situations and does not contact emergency services. Instead, it allows trusted contacts to see your current location when standard connectivity is unavailable.

Preparing your iPhone for satellite use

Before heading somewhere with limited coverage, it is important to confirm that location services and Find My are properly configured. On the iPhone, open the Settings app and tap Privacy & Security, then select Location Services and ensure the feature is turned on. Scroll down to Find My and confirm that location access is set appropriately.

Next, open the Find My app and make sure location sharing is enabled. If location sharing has not been set up, the app will prompt you to choose contacts who are allowed to view your location. Only contacts added in advance can receive location updates via satellite. If you are somewhere without cellular or Wi-Fi coverage, you’ll need to use Apple’s Connection Assistant. Open Settings, then tap Satellite and choose a satellite feature.

Apple also recommends reviewing the satellite connection demo, which is available within the Find My app and other satellite features. This demo shows how to hold the iPhone and move it to maintain a satellite connection. Practicing this step ahead of time can make the process quicker and less stressful when it is actually needed.

Viewing shared locations and managing access

Contacts who receive a satellite location update can see it in the same way as standard Find My location sharing. The location appears on the map with a timestamp indicating when it was sent. If additional updates are needed, the process must be repeated, provided satellite connectivity is still available.

Location sharing permissions can be managed at any time. In the Find My app, users can add or remove contacts and adjust how long location sharing remains active. These settings apply to both standard and satellite-based sharing.

How location sharing via satellite works

When an iPhone loses access to cellular and Wi-Fi networks, the Find My app can switch to satellite mode. This allows the device to send limited data packets to a satellite, which then relays the information to Apple’s network and on to the selected contact.

Because satellite bandwidth is limited, location updates are not continuous — the iPhone sends a snapshot of the user’s location rather than live tracking. Updates may take several minutes to send, depending on conditions and satellite availability.

Battery level can also affect satellite performance. Apple recommends ensuring the iPhone is sufficiently charged before relying on satellite features, especially during extended outdoor activities.

Important limitations to keep in mind

Satellite location sharing is not a replacement for Emergency SOS. In situations involving immediate danger, Emergency SOS via satellite should be used instead, as it connects directly with emergency services.

Environmental factors can significantly affect satellite connectivity. Cloud cover, terrain and obstructions can slow or prevent successful transmissions. The feature also works best outdoors with a clear view of the horizon.

Finally, satellite services are designed for occasional use rather than frequent messaging or tracking. Location updates may take longer than expected and should not be relied on for real-time navigation or coordination.

Sharing your location via satellite can provide peace of mind when traveling beyond the reach of traditional networks. By setting up the feature in advance and understanding its limitations, iPhone users can make better use of Apple’s satellite tools when they matter most.

This article originally appeared on Engadget at https://www.engadget.com/mobile/smartphones/how-to-share-your-location-via-satellite-on-iphone-130000085.html?src=rss

©
  •  

How to track your sleep and view your sleep data in Apple Health

Apple Health brings sleep tracking, scheduling and long-term analysis into one place, with your iPhone acting as the hub and the Apple Watch doing the overnight monitoring. Once everything is set up, Apple Health can show how long you slept each night, how consistent your sleep schedule is and how much time you spend in different sleep stages. Here is how to get started, track your sleep and review your data.

Sleep tracking in Apple Health relies on two things: You need to set up Sleep in the Health app on your iPhone, and you need a compatible Apple Watch to wear to bed. While you can set sleep schedules without a watch, detailed sleep data — including sleep stages — requires an Apple Watch.

How to set up Sleep in Apple Health

Sleep tracking is available on all watchOS 8 (or later) models and setup starts in the Health app on your iPhone. Open Health, tap Browse and then tap Sleep. If this is your first time setting it up, you will see an option to get started. Apple Health will guide you through choosing a sleep goal, setting a bedtime and wake-up time and deciding whether you want one sleep schedule for every day or different schedules for weekdays and weekends.

During setup, you can also enable sleep reminders and a wind-down period. Wind Down reduces distractions before bedtime by activating features like Focus mode and dimming notifications at a set time before sleep. These settings are optional but they help keep your schedule consistent, which improves the quality of the data Apple Health collects over time.

Once Sleep is configured, Apple Health automatically syncs those settings to your Apple Watch. You can adjust your sleep schedule later by returning to the Sleep section in Health and tapping Full Schedule and Options. Any changes you make here update on both your iPhone and Apple Watch.

How to prepare your Apple Watch for sleep tracking

To track sleep, your Apple Watch needs to be worn overnight and have enough battery to last until morning. If the battery drops below 30 percent before bedtime, your watch will prompt you to charge it first. Sleep tracking also relies on Sleep Focus which activates automatically based on your sleep schedule. Once Sleep Focus has been set, open the Settings app on your Apple Watch, tap Sleep and ensure that Track Sleep with Apple Watch is turned on. With both features enabled your watch can monitor sleep automatically without any manual start or stop each night. 

Comfort matters when wearing a watch to bed, so many people prefer a softer band for sleep. As long as the watch fits securely and stays in contact with your wrist, it can track sleep without issue.

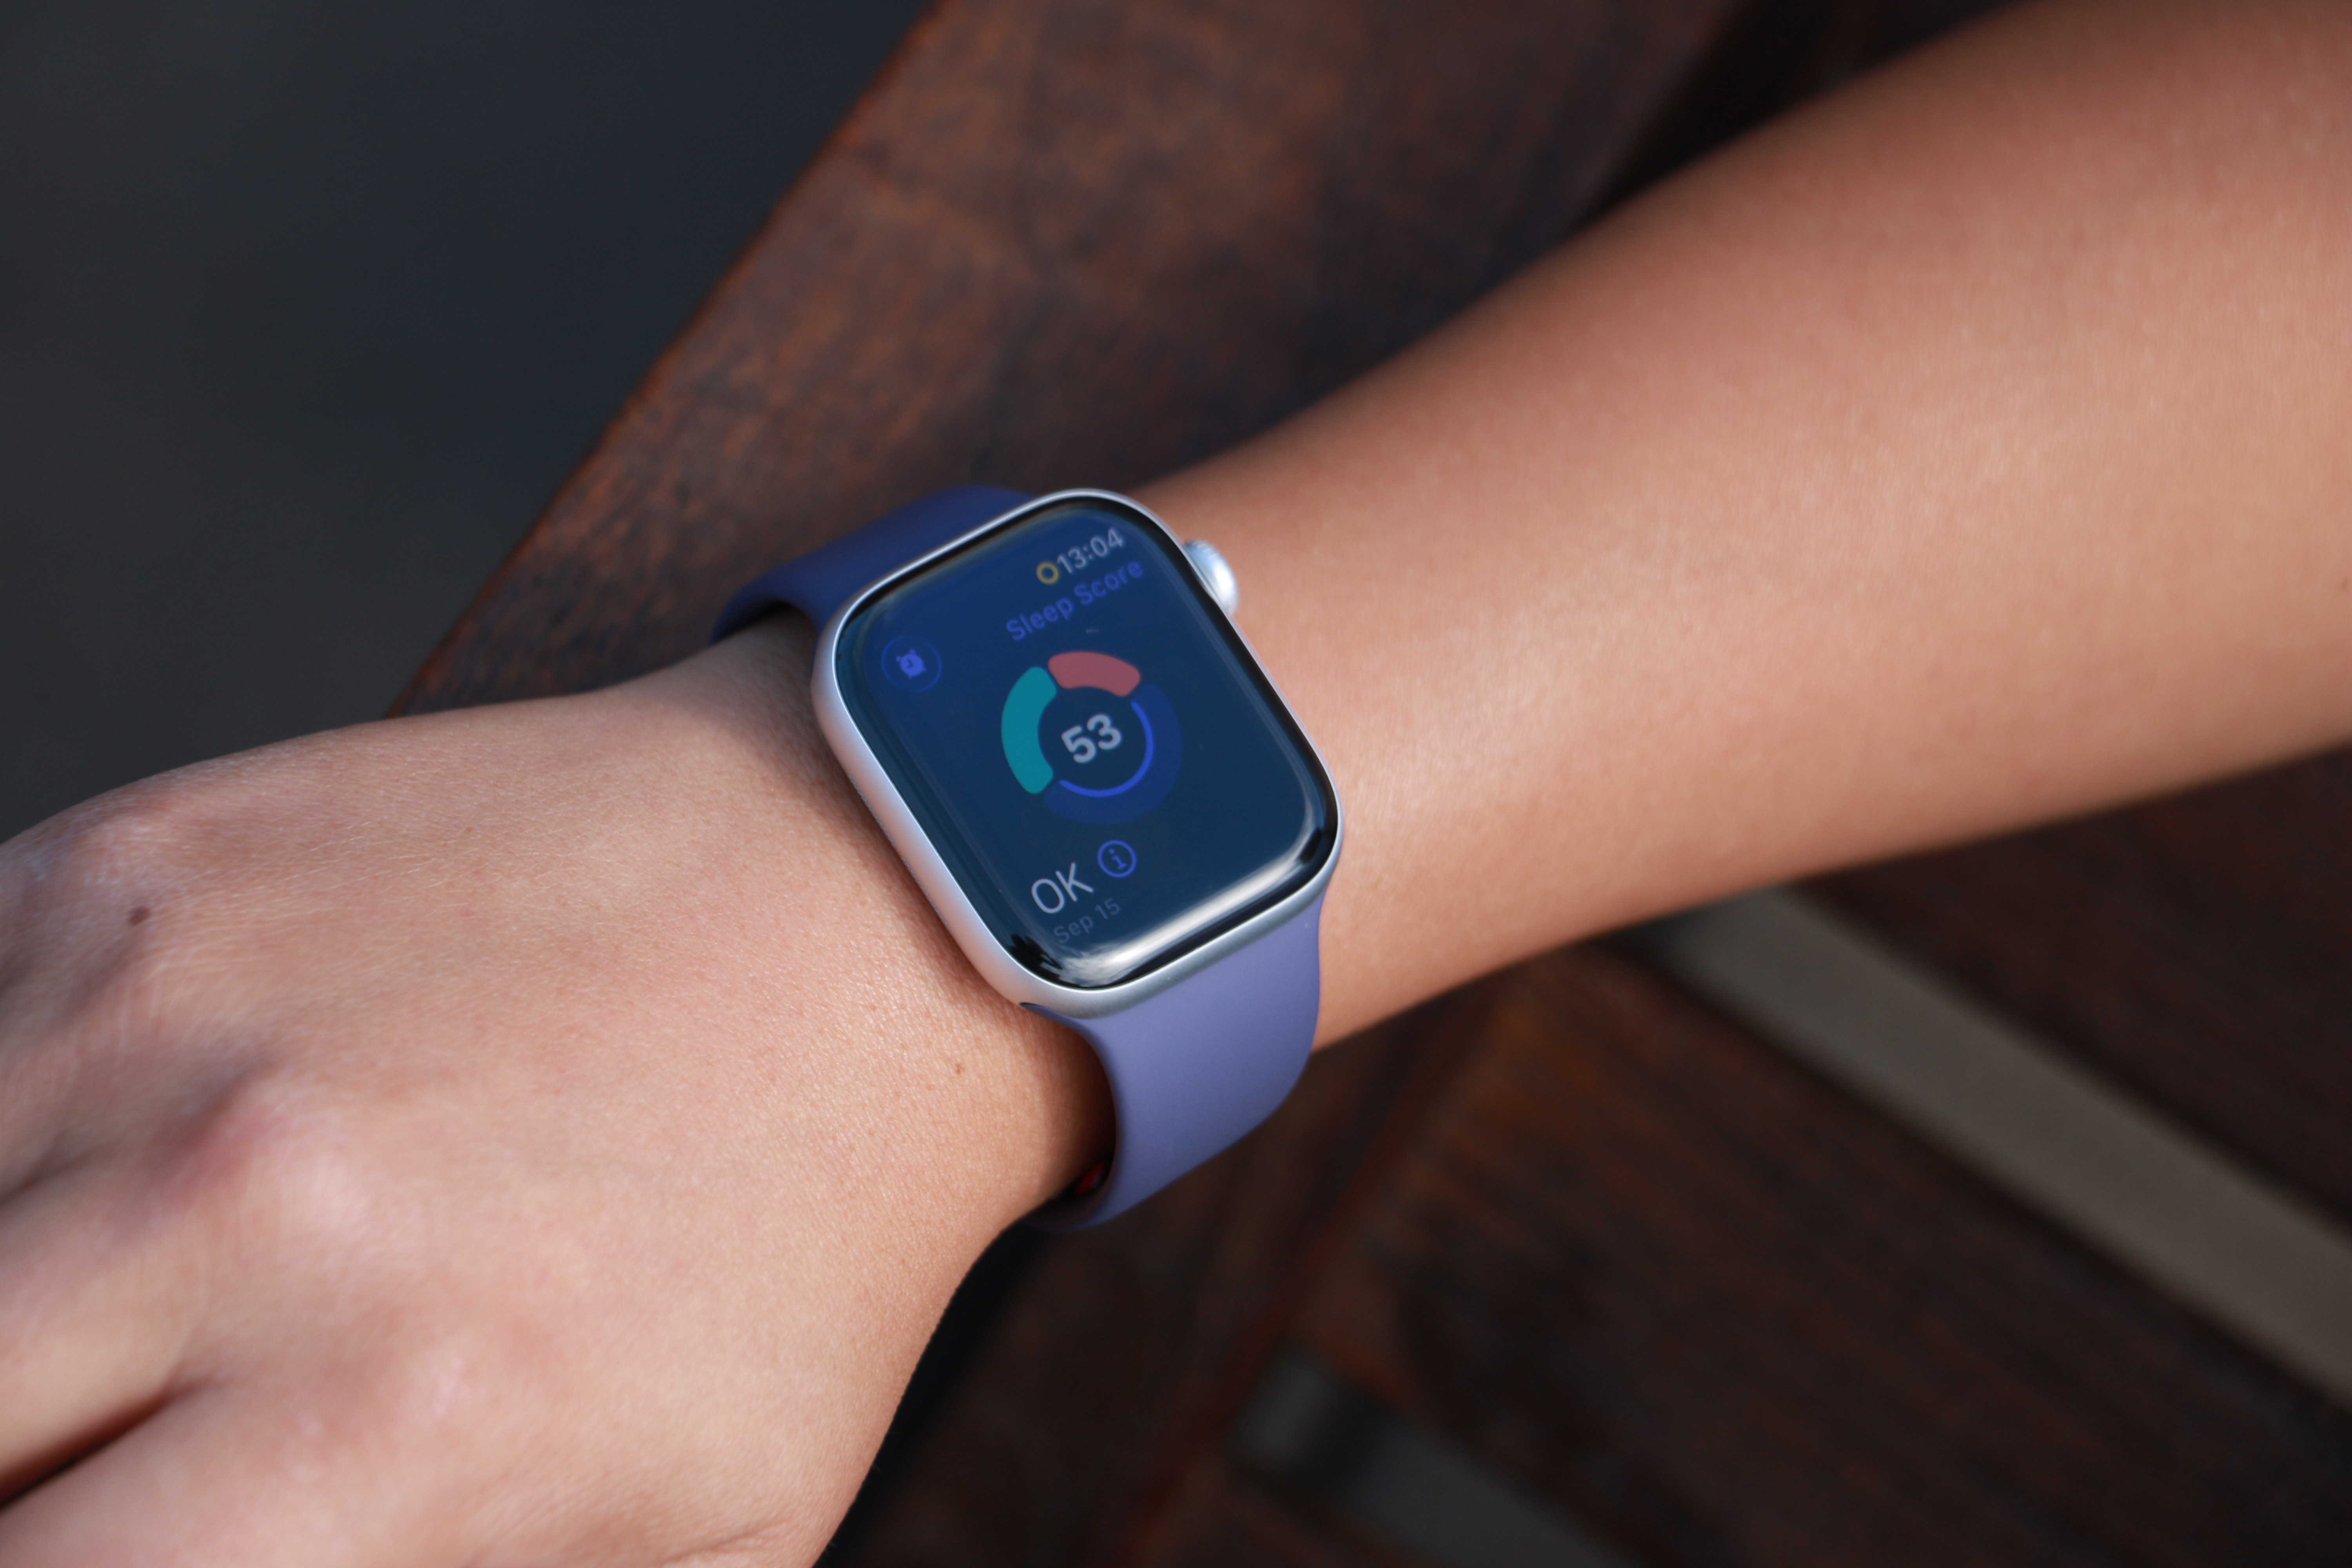
The Apple Watch Series 11 on a person's wrist, showing a ring with three segmented arcs encircling a Sleep Score of 53 and the description "OK" in the bottom left.
Cherlynn Low for Engadget

How Apple Watch tracks your sleep

When Sleep Focus is active, the Apple Watch uses its accelerometer and heart rate sensor to detect when you are asleep and awake. Newer models also track sleep stages, including time spent in REM, core and deep sleep. Apple Health combines this information into a single overnight record that appears in the Sleep section the next morning.

You do not need to start or stop sleep tracking manually. As long as you follow your sleep schedule or enable Sleep Focus before bed, the Apple Watch automatically does everything else. If you wake up early or go to bed later than planned, Apple Health adjusts the data based on actual movement and heart rate rather than just your scheduled times. In addition, some Apple Watch models (SE 3 or higher) support on-device Siri, enabling you to ask questions such as “how much sleep did I have last night?” for a more immediate response.   

How to view your sleep data in Apple Health

To see your sleep data, open the Health app on your iPhone and tap Browse, then Sleep. At the top of the screen, you will see a chart showing how long you slept the previous night. Tapping this chart reveals a detailed breakdown, including time asleep, time in bed and sleep stages (if available).

Scrolling down shows trends over longer periods. You can switch between daily, weekly, monthly and six-month views to see patterns in your sleep duration and consistency. Apple Health also highlights whether you are meeting your sleep goal and how regular your schedule has been.

Under Highlights, Apple Health may surface insights such as changes in average sleep time, variations in sleep stages or your nightly sleep score. Sleep scores provide a simplified summary of how well you slept, and is based on factors such as duration, consistency and restfulness. These summaries update automatically as more data is collected over time.

Understanding sleep stages and trends

If your Apple Watch supports sleep stages, Apple Health displays how much time you spent in REM, core and deep sleep. These stages give context to your overall sleep quality, though Apple emphasizes trends over individual nights. Occasional short nights or unusual stage distributions are normal.

Over time, Apple Health makes it easier to spot patterns. Consistently short sleep durations, irregular bedtimes or frequent awakenings become clearer when viewing weekly or monthly summaries. This makes the Sleep section useful not just for nightly check-ins but for understanding longer-term habits.

Editing and managing sleep data

Apple Health allows you to add or edit sleep data if needed manually. In the Sleep section, tap Add Data to log sleep that was not recorded automatically. This can be useful if you forget to wear your watch or take a nap without it.

You can also manage which devices contribute sleep data by scrolling to the bottom of the Sleep screen and tapping Data Sources and Access. This is helpful if you use third-party sleep apps or multiple devices.

Once set up, sleep tracking in Apple Health runs quietly in the background. With a consistent schedule and a charged Apple Watch, your sleep data builds into a clear picture of your nightly rest, all stored securely within Apple’s health platform.

This article originally appeared on Engadget at https://www.engadget.com/mobile/smartphones/how-to-track-your-sleep-and-view-your-sleep-data-in-apple-health-130000023.html?src=rss

©

  •  

NordVPN deal: Get two years of the Complete plan for 70 percent off

NordVPN is offering a significant discount on its two-year plans, with 70 percent off its Complete tier and up to 74 percent off overall. For the Complete tier, the deal brings the total cost down to $130 for 24 months.

NordVPN regularly appears on Engadget’s list of the best VPN services thanks to its wide server network, strong security tools and consistent performance across devices. NordVPN’s latest promotion puts one of its most comprehensive plans at a price that undercuts many competing premium VPN subscriptions.

The Complete tier includes full access to NordVPN’s core VPN service, which encrypts internet traffic and masks a user’s IP address to help protect online activity on public Wi-Fi networks and at home. Subscribers can use the service on multiple devices, including phones, tablets, laptops and smart TVs, with apps available for major operating systems. It also includes access to NordPass (more on that below), an ad blocker and 1TB of cloud storage. You’ll find similar discounts on all of NordVPN’s other plans: Basic, Plus and Prime.

Beyond the basics, NordVPN offers features like threat protection to help block malicious websites and trackers, as well as specialty servers designed for added privacy or faster performance in specific scenarios. In our NordVPN review, the service was praised for its evolving feature set and overall reliability, even as the VPN market becomes increasingly competitive.

Engadget regularly tracks VPN pricing trends and this offer compares favorably with other current promotions. It also appears alongside NordVPN deals featured in Engadget’s ongoing roundup of the best VPN discounts available right now, which compares offers from multiple major providers.

Those looking for additional security tools may also want to note that NordVPN’s Complete plan bundles in extra services beyond the VPN itself. One of those is NordPass, the company’s password management app. NordPass is also discounted as part of a separate promotion, if you’re primarily looking for a password manager rather than a VPN. The Premium tier is currently 50 percent off, bringing the price down to $36 for two years. NordPass Premium adds features such as cross-device password syncing, secure password sharing and breach monitoring, which alerts users if stored credentials appear in known data leaks.

Both offers are available for a limited time, though Nord has not specified an end date for the promotion. If you’re still unsure whether NordVPN is right for you, it offers a 30-day money-back guarantee, so you can change your mind and get a full refund.

This article originally appeared on Engadget at https://www.engadget.com/deals/nordvpn-deal-get-two-years-of-the-complete-plan-for-70-percent-off-123000517.html?src=rss

©

  •  

How to turn on hypertension alerts on Apple Watch

Apple has steadily expanded the Apple Watch’s health monitoring features over the years, moving beyond fitness tracking into areas that can offer early insight into potential medical concerns. One of the most recent additions is hypertension alerts, which are designed to notify users when their blood pressure trends are elevated over time. While Apple Watches cannot directly measure blood pressure, this feature can still play a useful role in highlighting patterns that may be worth discussing with your doctor. Here, we’ll explain what hypertension alerts do, how they work and how to enable and manage them on the Apple Watch.

What hypertension alerts do

Hypertension alerts are designed to identify long-term trends that may indicate elevated blood pressure. Instead of relying on a traditional cuff measurement, the Apple Watch analyzes a combination of health data collected over a 30-day period, including heart rate, movement patterns and other contextual information stored in the Health app. Using this data, the system looks for sustained changes that align with patterns commonly associated with hypertension.

If your Apple Watch detects a trend suggesting elevated blood pressure over an extended period, it’ll send you a notification. These alerts are not intended to diagnose hypertension or replace medical testing. Instead, they serve as an early signal that something may have changed and that you may want to seek further monitoring or professional advice.

Apple emphasizes that hypertension alerts are designed for users who have not already been diagnosed with high blood pressure. Instead, they are meant to raise awareness rather than confirm a condition.

Who can use hypertension alerts

Hypertension alerts require a compatible Apple Watch model (Apple Watch Series 9 or later, or Apple Watch Ultra 2 or later) paired with a supported iPhone (iPhone 11 or later). The feature also depends on recent versions of watchOS and iOS, as it relies on updated health algorithms and background data analysis. To use hypertension alerts you must be 22 years of age or older, not be pregnant and not have been diagnosed with hypertension. You also need to ensure that your Apple Watch’s Wrist Detection feature is turned on.  

To receive meaningful alerts, your Apple Watch needs sufficient data. This means wearing the watch regularly, including during sleep if sleep tracking is enabled, and keeping health details such as age, sex, height and weight up-to-date in the Health app. The system uses long-term trends, so alerts will not appear immediately after enabling the feature.

How to turn on hypertension alerts

Hypertension alerts are managed through the Health app on the paired iPhone. The feature cannot be enabled directly from the watch itself. During setup, the Health app will ask for confirmation that the user has not been diagnosed with hypertension. It may also prompt a review of health details such as date of birth and biological sex, as this information helps improve the accuracy of trend analysis.

To get started, open the Health app on the iPhone paired with the Apple Watch. From the main Health screen, tap your profile in the top corner. Select Health Checklist from the available Features. Next, you’ll need to tap Hypertension Notifications, confirm your age and whether or not you’ve ever been diagnosed with hypertension. Tap Continue and follow the on-screen prompts for information on how the notifications work. Once you have done this, tap Done and you’ll be all set. 

Once enabled, the feature runs automatically in the background. There is no need to manually start monitoring or interact with the feature daily.

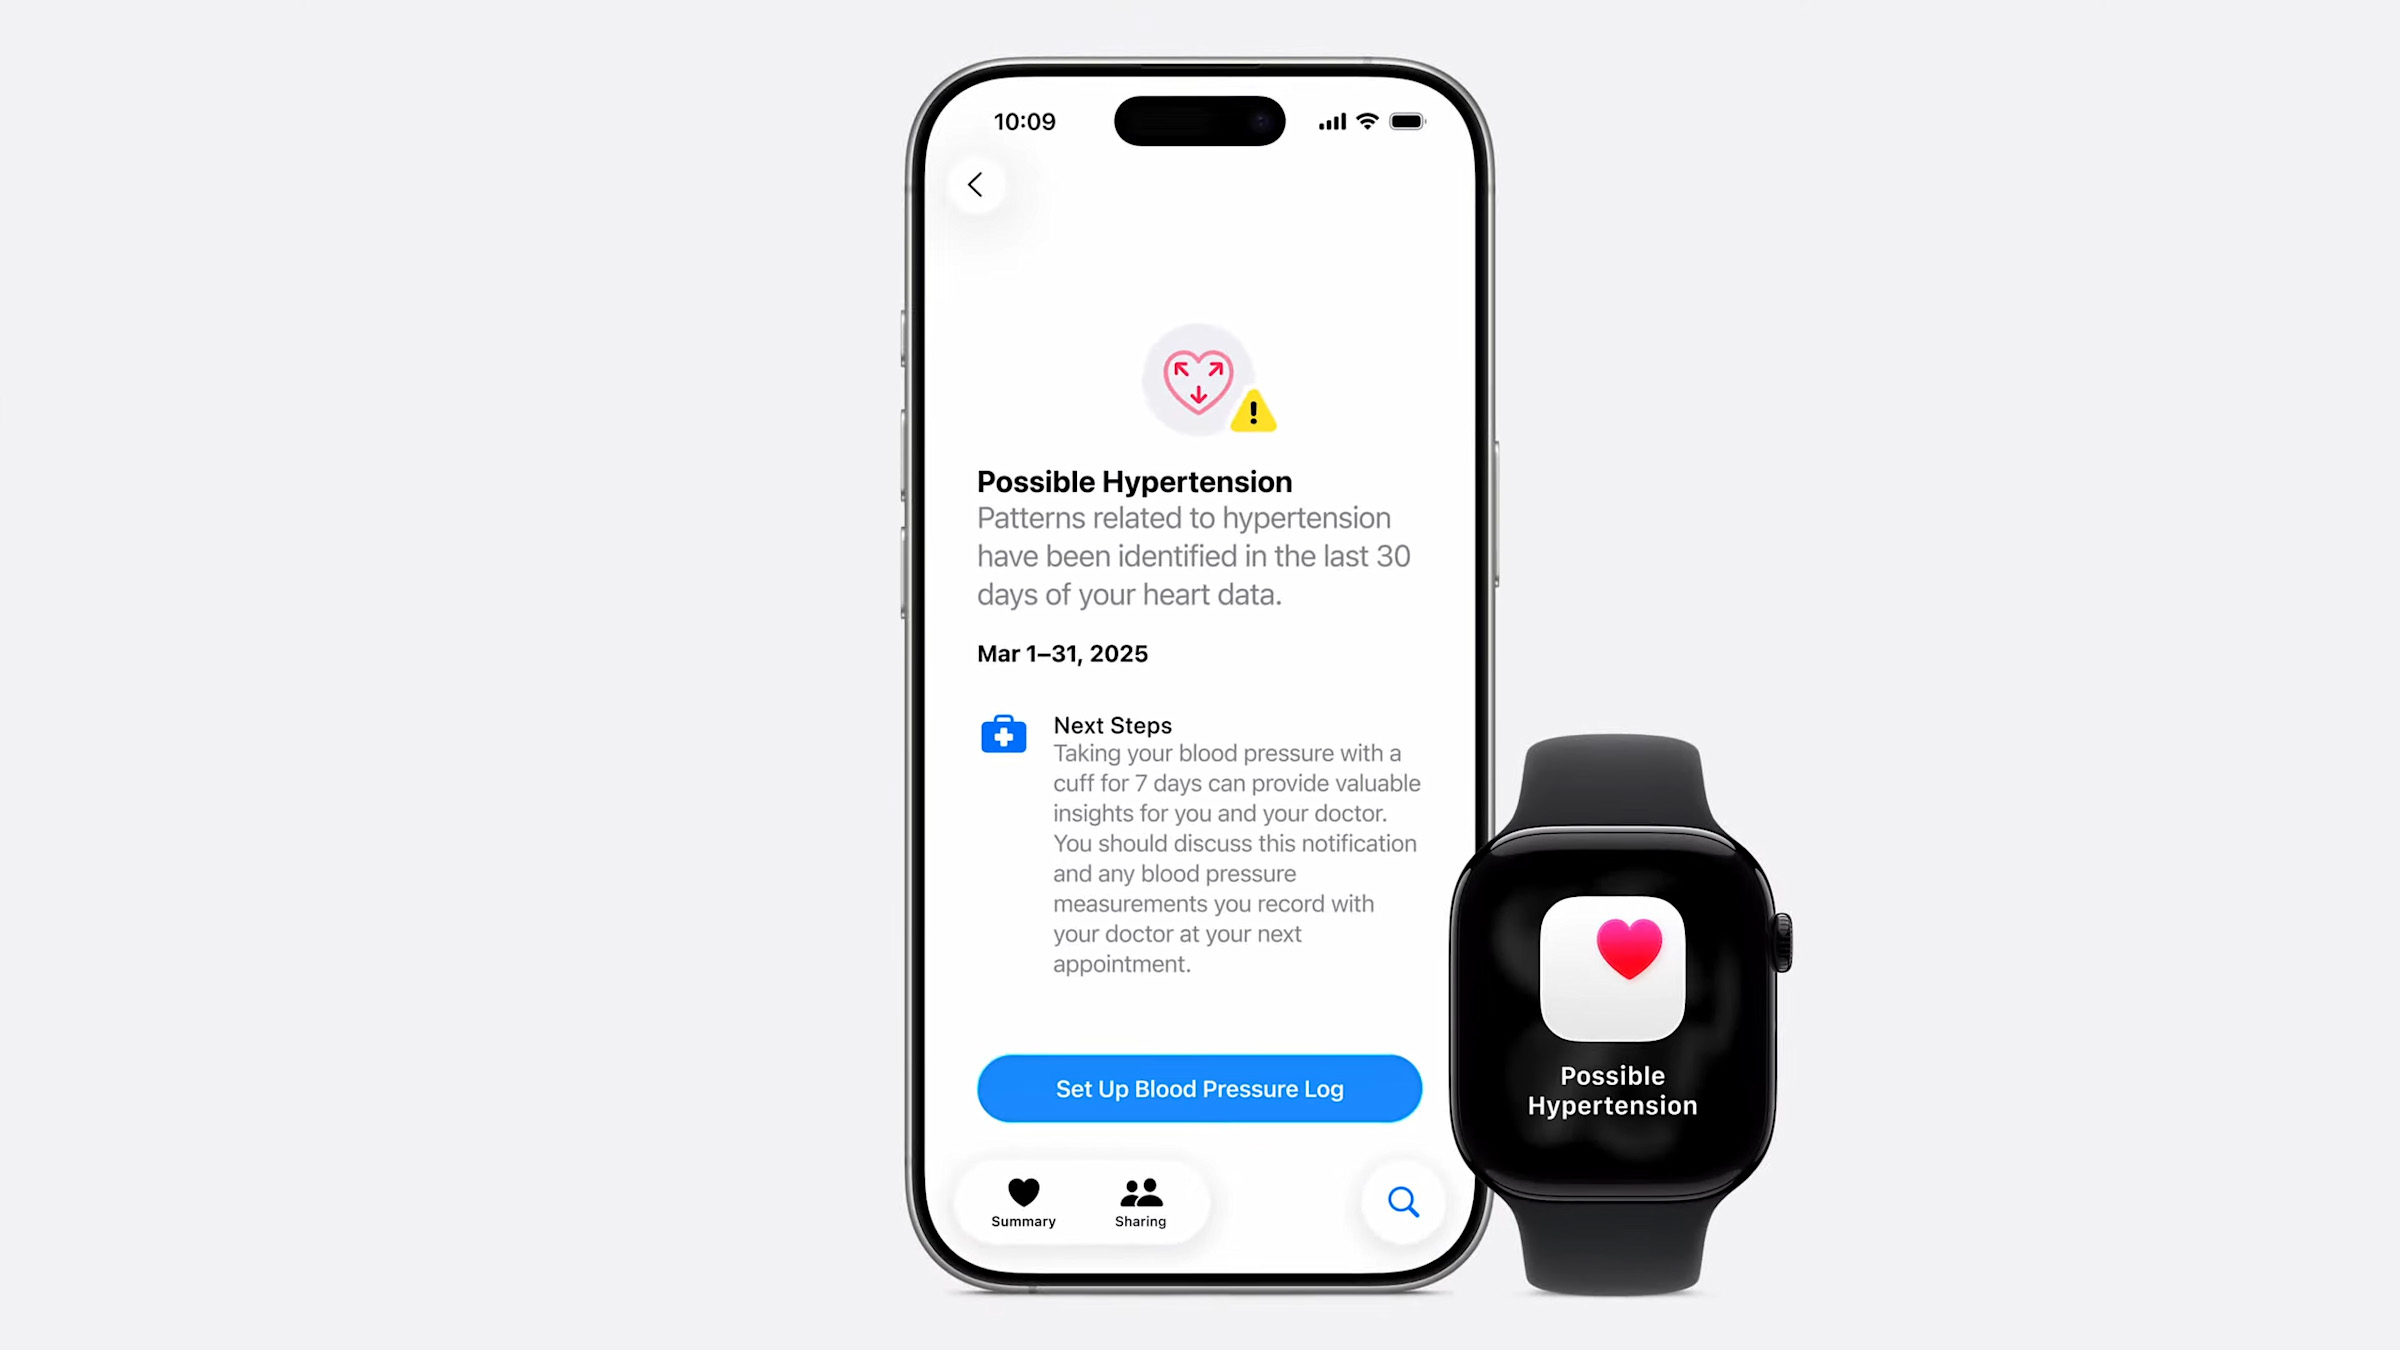
The new apple watch series 11 can help identify hypertension
Apple

Managing notifications and alerts

When hypertension alerts are turned on, notifications appear on both the Apple Watch and the paired iPhone. These alerts typically explain that a long-term trend suggesting elevated blood pressure has been detected, along with guidance on next steps.

Users can manage how and when these notifications appear by adjusting notification settings for the Health app. This includes choosing whether alerts appear on the lock screen, in Notification Center or as time-sensitive notifications on Apple Watch.

Health data related to hypertension alerts can be reviewed at any time in the Health app. While Apple Watch does not display a specific blood pressure number, users can view contextual information and educational material explaining what the alert means and what actions may be appropriate.

How hypertension alerts can help

Hypertension often develops gradually and may not cause noticeable symptoms in its early stages. Because of this, many people are unaware of elevated blood pressure until it is identified during a routine medical check.

Hypertension alerts can let you know of subtle changes that might have otherwise gone unnoticed. For some users, an alert may prompt earlier conversations with a doctor, additional blood pressure monitoring at home or lifestyle changes such as adjustments to diet, activity or sleep habits.

It is important to treat these notifications as informational rather than diagnostic. Apple Watch does not provide specific blood pressure readings and cannot confirm hypertension on its own.

What to do if you receive an alert

Receiving a hypertension alert does not mean that there is an immediate medical emergency. Apple recommends using the alert as a prompt to pay closer attention to your cardiovascular health.

Many users choose to follow up by measuring blood pressure using a traditional cuff at home or by scheduling a check with a healthcare professional. A doctor can provide proper testing, diagnosis and guidance based on clinical measurements and individual risk factors.

It is also worth reviewing lifestyle factors that can influence blood pressure, such as physical activity levels, sleep quality, stress and diet. Apple Watch can already help track many of these areas, which may provide useful context when discussing health concerns with a professional.

Limitations to keep in mind

Hypertension alerts are not available in all regions and may be subject to regulatory approval. The feature also requires consistent Apple Watch use over time to generate reliable trend data.

Most importantly, the Apple Watch does not measure blood pressure directly. The alerts are based on correlations and trends rather than direct readings, which means they should not be used as a substitute for medical equipment or professional care.

This article originally appeared on Engadget at https://www.engadget.com/wearables/how-to-turn-on-hypertension-alerts-on-apple-watch-130000090.html?src=rss

©

  •  

How to use Workout Buddy with Apple Watch and iOS 26

Apple’s iOS 26 and watchOS 26 introduced a new fitness companion called Workout Buddy. This feature uses Apple Intelligence to provide spoken feedback during workouts and give motivation based on your activity history. Workout Buddy analyzes your pace, heart rate, distance and other metrics to deliver real-time encouragement and performance insights directly through connected Bluetooth headphones. It works in conjunction with the Workout app on Apple Watch and is partially controlled through the Fitness app on iPhone. This guide walks you through everything needed to set up and use Workout Buddy effectively during workouts.

What Workout Buddy does

It’s important to note that Workout Buddy is not a full coaching program. Instead, it adds to your workout with spoken cues that reflect how your session is going. Workout Buddy can remind you of your weekly activity totals, alert you to personal bests or performance milestones and provide an overview when you’re finished. It is designed to feel like a supportive training partner rather than a strict coach.

The feature operates in English by default and uses a text-to-speech model trained on voices from Apple Fitness+ trainers. It is available for a subset of workout types, including running, walking, cycling, high-intensity interval training (HIIT) and strength training. It requires on-device Apple Intelligence, which means you’ll need to keep one of the latest iPhones running updated software nearby during workouts. 

Supported models include iPhone 15 Pro, iPhone 15 Pro Max and any iPhone 16 model. You’ll also need an Apple Watch running watchOS 26.  

Requirements before you begin

Before Workout Buddy appears in your Fitness app or Workout app you must ensure a few things are in place. First, your Apple Watch must be running watchOS 26 or later and paired to an iPhone with iOS 26 installed. Second, your iPhone must be capable of on-device Apple Intelligence, meaning you must own one of the supported iPhone models we mentioned above and have Apple Intelligence enabled in the phone’s settings.

You’ll also need Bluetooth headphones paired with either your iPhone or your Apple Watch. Workout Buddy’s audio feedback cannot play through the watch speaker so headphones are essential. Lastly, your device language must be set to English, at least initially. If any of these things are missing, the option to enable Workout Buddy may not appear.

How to turn on Workout Buddy from iPhone

While much of the interaction with Workout Buddy happens on Apple Watch during workouts, you can enable it and choose voice options from the Fitness app on iPhone.

Open the Fitness app on your iPhone and tap the Workout tab at the bottom. Scroll through the list of workout types until you find one you plan to use with Workout Buddy. Tap the waveform bubble icon associated with that workout. This will bring up settings where you can turn on Workout Buddy. Flip the toggle to enable it and choose a voice from the available options. Once you have selected a voice, close that screen and your choice is saved. When you start this workout type on Apple Watch, Workout Buddy will activate.

Enabling Workout Buddy for a workout type on iPhone means you do not need to toggle it on separately on Apple Watch each time for that specific workout. However, you may still adjust it from the watch interface for more granular control.

How to turn on Workout Buddy on Apple Watch

To use Workout Buddy during a session, open the Workout app on your Apple Watch. Turn the Digital Crown to scroll through and select the workout you want to do, such as Outdoor Run, Outdoor Walk, Outdoor Cycle, HIIT or Strength Training. If you want to see all available workouts, tap the Add button at the bottom.

Once the workout type is selected, look for the Alerts button on screen. Tap Alerts then scroll until you see Workout Buddy. Tap Workout Buddy and flip the switch to on. You will then be asked to choose a voice if one is not already selected on your iPhone. After selecting the voice, return to the previous screen and tap Start. Workout Buddy will begin working as soon as the workout does.

Using Workout Buddy during a workout

Once you start an exercise on your Watch or iPhone, Workout Buddy will speak to you through your connected headphones. The feedback is designed to be encouraging and relevant to your pace, performance or milestones. It may mention your current progress toward activity goals, pace, splits, personal bests or other highlights from your fitness data. At the end of your session Workout Buddy will offer a summary of key metrics like duration distance and calorie burn.

While a workout is active, you can temporarily mute the audio if you need silence. On Apple Watch during the session, swipe right to reveal controls then tap Mute. This pauses Workout Buddy’s spoken commentary without disabling the feature entirely.

Customizing and managing Workout Buddy settings

Workout Buddy is enabled on a per-workout-type basis. If you prefer voice feedback for running but silence for strength training, you can enable it for one and leave it off for the other. The Fitness app on iPhone allows you to set a default voice preference for each workout type. On Apple Watch you can quickly toggle the feature on or off before starting a session.

If Workout Buddy does not appear as an option for a particular workout type, you may need to check compatibility. Apple’s documentation indicates that only certain types* are supported initially and that the option will not appear for unsupported workouts.

*Apple Watch SE (2nd generation), Apple Watch SE 3, Apple Watch Series 6, Apple Watch Series 7, Apple Watch Series 8, Apple Watch Series 9, Apple Watch Series 10, Apple Watch Series 11, Apple Watch Ultra, Apple Watch Ultra 2, Apple Watch Ultra 3

Troubleshooting common issues

If Workout Buddy fails to activate make sure your devices meet the requirements outlined above. Confirm that your iPhone with Apple Intelligence is nearby and that Bluetooth headphones are connected. If audio feedback is missing, ensure headphones are paired correctly and that the language is set to English. Some users have reported that if the headphones are paired only to the Watch rather than the iPhone, it can interfere with feedback. Switching to the iPhone often resolves that issue.

For workout types where Workout Buddy previously worked but suddenly does not appear, you may try toggling the feature off and on again in the Fitness app or rebooting both devices. In rare cases removing and re-adding the workout type on Apple Watch can refresh the settings.

This article originally appeared on Engadget at https://www.engadget.com/wearables/how-to-use-workout-buddy-with-apple-watch-and-ios-26-130000922.html?src=rss

©

  •  

How to pair AirPods with any device

AirPods work most smoothly with Apple hardware, but they also connect reliably to Android phones, Windows laptops and other Bluetooth devices. The pairing process depends on the platform in use although the basics remain the same. Once the AirPods are placed in pairing mode, most devices detect them quickly and handle the remaining steps in the background. The guide below explains how to pair AirPods with Apple products, how the process differs on newer iPhones that support H2 features and how to connect them to non-Apple devices.

How to pair AirPods with Apple devices

Apple builds AirPods to pair almost instantly with devices in its own ecosystem. Opening the charging case near an unlocked iPhone or iPad usually brings up an on-screen prompt. Tapping Connect links the earbuds to the device and to every other Apple product signed into the same iCloud account. After that, switching between devices is automatic. Audio output follows the active device as long as each product is using updated software and is signed in with the same Apple ID.

If the pairing prompt does not appear, there are a few simple checks that help things move along. Opening the Control Center and selecting the audio output menu confirms whether the AirPods already appear as an available device. If they are listed there, choosing them establishes the connection. If they do not appear, opening the Settings app and checking Bluetooth usually reveals whether the AirPods are in range or already recognized. Opening the case while viewing the Bluetooth menu often triggers the pairing card once more.

The process is similar across Apple Watch and Mac. When the AirPods are already linked to an iPhone, they tend to show up automatically on a paired Apple Watch. On Mac, opening System Settings and viewing the Bluetooth section reveals the same device list seen on an iPhone. Selecting the AirPods from that list completes the connection and also syncs the pairing status back to every other Apple device using the same account.

Enhanced pairing with newer iPhones

Some newer iPhones support features enabled by the H2 chip used in newer AirPods models. With compatible AirPods, models such as iPhone 15 Pro, iPhone 15 Pro Max and the iPhone 16 lineup tend to deliver a faster and more responsive setup experience. When an AirPods case is opened near one of these phones, the device quickly detects the earbuds and displays the pairing card with little delay. This also tends to speed up transitions between devices and improves reliability when switching audio sources.

If the fast pairing prompt does not appear on a newer iPhone, reopening the case while the phone is unlocked is usually enough to reinitiate the process. It also helps to confirm that Bluetooth is turned on. Placing the AirPods back in the case for a few seconds and trying again will often reset the pairing state if the earbuds were connected elsewhere.

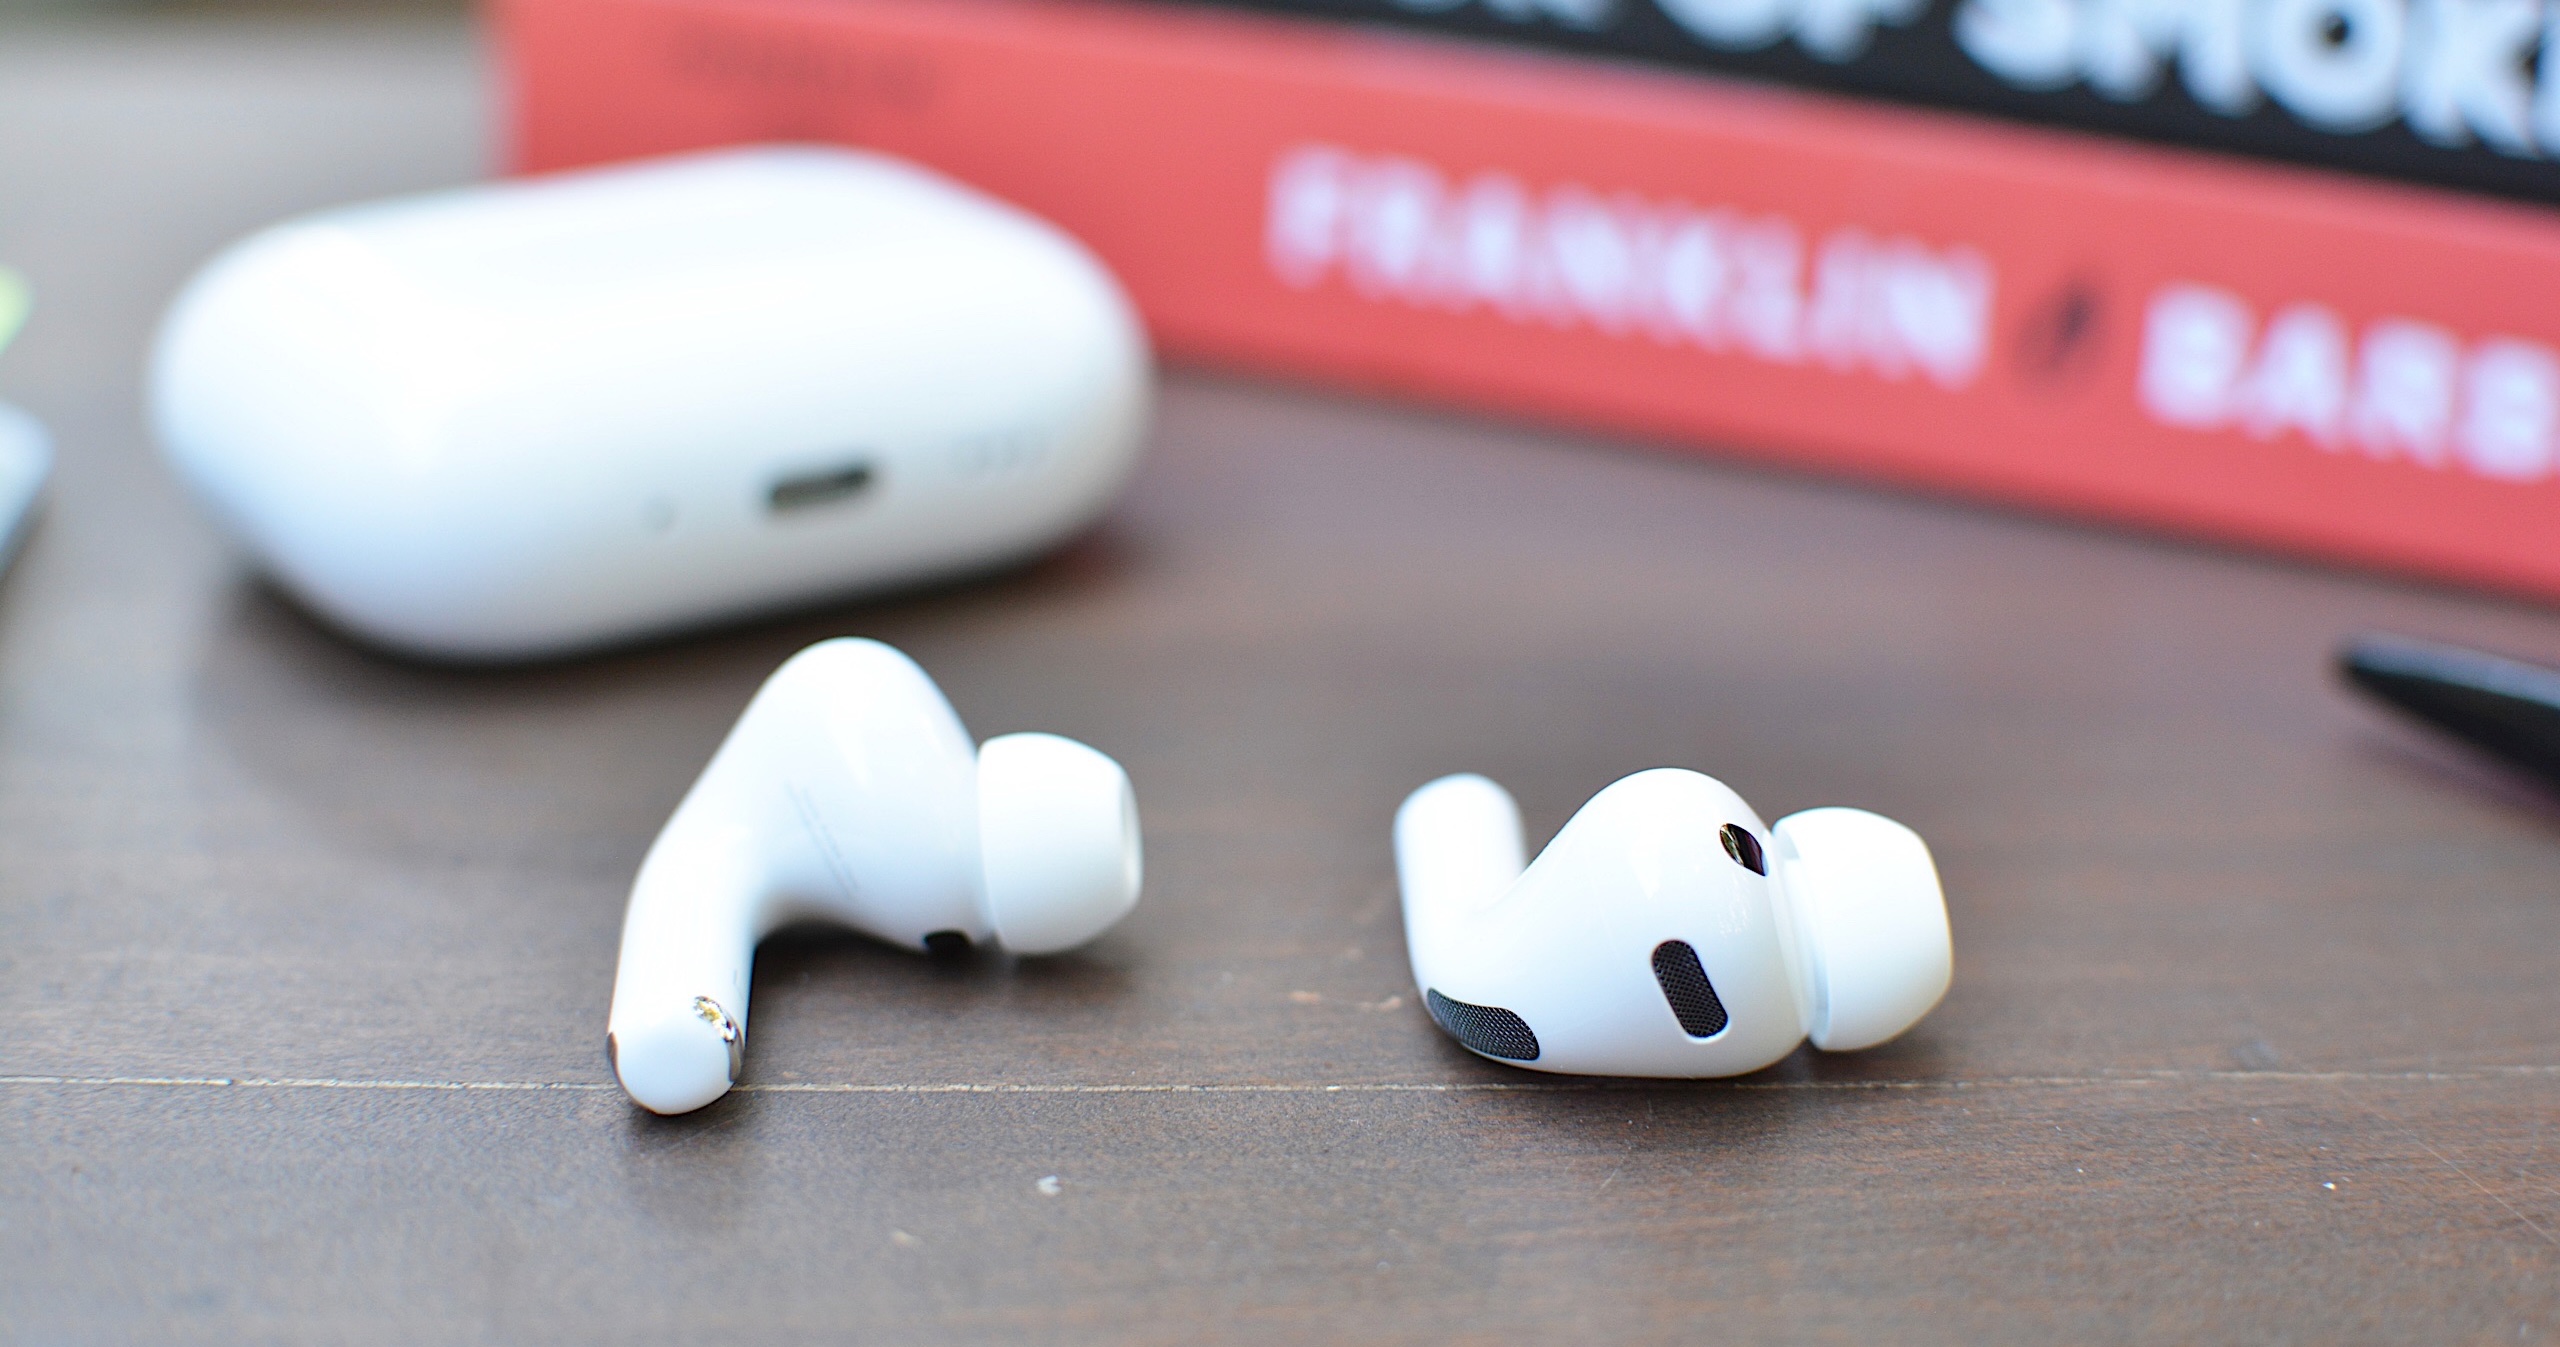
AirPods Pro 3
AirPods Pro 3
Engadget

How to put AirPods into pairing mode

Every AirPods model supports a manual pairing mode. This is essential when linking the earbuds to devices outside the Apple ecosystem, or when the automatic prompt fails to appear on an iPhone or Mac. On older AirPods models, pairing mode is activated by opening the lid and pressing and holding the setup button on the back of the case until the LED light flashes white. Newer models, including AirPods 4 and AirPods Pro 3, use a touch-based method instead. With the lid open, tapping the area near the LED light places the earbuds into pairing mode. Leaving the lid open keeps the AirPods discoverable for nearby devices. Closing the case ends the process and requires it to be repeated if the device fails to detect them.

Pairing mode does not remove any previous connections. It simply makes the AirPods available to new devices, which is helpful when switching between ecosystems. However, connecting to a new device usually takes priority. If the AirPods are already linked to something else that is nearby, turning off Bluetooth on the previously connected device prevents interference and helps the new device detect them more easily.

How to pair AirPods with Android devices

Although AirPods are designed for Apple hardware, they function like any other Bluetooth earbuds on Android. Opening the case and placing the AirPods in pairing mode allows Android phones to detect them through the standard Bluetooth menu. The earbuds appear in the list of available devices and selecting them initiates the connection. Once paired, AirPods work for calls and media playback. Some features, such as automatic ear detection and battery status indicators, may require a third-party app on Android and are not supported at a system level. Features such as spatial audio and device switching remain exclusive to Apple’s ecosystem but day-to-day performance is consistent on Android.

If the AirPods fail to appear, refreshing the Bluetooth device list on the Android phone usually helps. Making sure the earbuds are still in pairing mode is essential since the white LED indicator stops flashing after a short period. Reopening the case and holding the button again, or tapping on the front for newer models, restores discoverability.

How to pair AirPods with Windows laptops

Windows 11 handles AirPods as a regular audio device. Opening the Bluetooth and Devices menu in System Settings displays a list of nearby accessories. With the AirPods in pairing mode, the laptop should detect them and display them as an audio device. Selecting them completes the process and adds the earbuds to the device’s known accessories. Windows generally reconnects to AirPods automatically on future sessions as long as Bluetooth remains enabled.

If the earbuds do not appear in the list, toggling Bluetooth off and back on helps the system refresh the device scan. Checking whether the AirPods are already linked to a different device is another useful step. Windows sometimes struggles to take over a connection when the earbuds remain in range of a previously paired phone so disabling Bluetooth on the other device often resolves the issue.

Troubleshooting common pairing issues

Most pairing problems come down to the AirPods not being in discoverable mode or being connected to another device nearby. Resetting the earbuds solves many problems. On AirPods models with a setup button, placing the AirPods in the case, leaving the lid open and holding the button until the LED turns amber then white restores the factory pairing state. On newer models without a physical button, place the AirPods in the case, close the lid for about 30 seconds, then open it and quickly tap the front of the case three times. The status light should then flash amber and then white, to indicate that the reset is complete. This clears previous connections and makes the AirPods behave as if they are new out of the box. 

Low battery levels can also interrupt pairing. Ensuring both the earbuds and the case have enough charge prevents unexpected disconnections during setup. Interference from other wireless accessories affects pairing on crowded networks. Moving to a quieter spot or turning off surrounding Bluetooth devices helps the AirPods stand out when scanning.

AirPods are built to pair quickly with Apple devices but they also integrate smoothly with other platforms. Keeping the earbuds in pairing mode and confirming that Bluetooth is enabled on the device in use ensures a smooth setup every time. Once connected, the AirPods tend to remember the device and reconnect whenever they are nearby which keeps day-to-day use simple regardless of the platform.


This article originally appeared on Engadget at https://www.engadget.com/audio/headphones/how-to-pair-airpods-with-any-device-140000234.html?src=rss

©

  •  
❌